NB: Due to the way WordPress (frustratingly) displays quotation marks you will need to manually tweak the quotation marks in any formulas shown below that you want to copy and paste. WordPress changes straight quotation marks into curly ones…these curly blighters will not work in Excel….bah!
If you manage email recipient data for email marketing campaigns or newsletters, you can sometimes be faced with having to upload data that has been collected or given to you in a format that is not quite suited to your existing list or database.
One of the most common mini-challenges is where an email broadcast system has a customer list set up to store ‘fullname’ but you get supplied with recipient data that has a separate column for ‘firstname’ and ‘lastname’. Sometimes there might be three columns with the ‘title’ being added too.
Here’s an example:

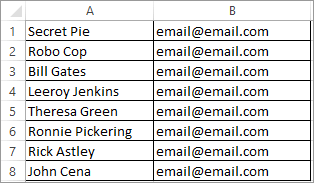
This might be what you actually need though, to upload into your email broadcast software:

Ok, we’ll show you a simple way to get from the first picture to the second. Naturally, you can do it by hand if you just have 10 or so to sort out, but this method will work whether your list is for a few or thousands.
First of all, save a separate copy of the raw data file you are using, just so that you can start again if something goes badly wrong – just save it to a new folder on your desktop, or rename it slightly and save it wherever you normally keep email data.
Next, decide on what data you need and what data you are wanting to merge. In this example I just need the firstname and lastname to be merged together in one column, and the email addresses in another. I don’t need the ‘Title’ data so I will delete that column, and I would delete any other columns that aren’t necessary (sometimes data can be sent for email marketing with lots of other columns such as ‘job title’, ‘address’, ‘postcode’, etc). I will also delete the first row with the column names in as usually email broadcast software can’t handle this very well or tries to include it as a recipient file! My data now looks like this:

Step one of the merge process is to insert a new column between the ‘last name’ (column B) and the ’email’ (column C). To do this quickly, click the top of the email column (column C) so that the whole column gets highlighted, then right click anywhere in that column and select ‘Insert’ from the menu that appears. You will now have this:

Ok, click the first cell at the top of the new blank column (which is now column C in this example….so click cell C1) and type in the following formula to merge the top cells of the ‘firstname’ and ‘lastname’ columns together – cells A1 and B1 in this example:
=A1&” “&B1
The merged data as you wanted it should now appear in that cell, as shown here:

That formula has everything you need to do a simple merge and also inserts the important space between the firstname and lastname so that data is clean and correctly formatted. If you were working with data where you needed the two columns to be merged together without a space inbetween the two values then you would use =A1&B1 as the formula. For example, to turn Robo Cop in this data example into his correct name, RoboCop, you would change the formula for that particular cell to =A4&B4…give it a try.
To complete the task of merging rest of the data down the rows then you need to mouse over the bottom right of the cell that you have just put the formula into (C1 in this example) where there is a small black square (your mouse cursor will turn into a small black + when you mouse over it) – this is known as the ‘fill-handle’. Double click this and the rest of the column will be filled with the merge formula, and you should see the following result:

That’s a fairly easy example, but in the world of customer data you rarely get everything submitted in such a neat format to start with. So here’s an extra tweak to the formula to help you tidy up another common area that can be problematic…
If your data file has lots of incorrect uses of case where the names have been entered then you need to use the PROPER function to tidy this up. For example, you may have some or all the names entered in UPPERCASE, or some or all of the firstnames might begin with lower case letters, or any mix of that. If so, or if you are using such a large file that you can’t be confident of the quality by doing a visual check, then change the formula you just used to:
=PROPER(A1&” “&B1)
This will turn data such as this…

…into this:

FINAL IMPORTANT NOTE
To finish the file off and to be able to save it to use it in your email broadcast software you still need to do a couple of quick tasks. At the moment, the merged data is just a list of formulas but you need it to have its own value. If you deleted the first two columns at this stage then all the data in the merged column that you are wanting to keep and use would turn to #REF! instead!
You now need to click the top of the merged column (column C in our example) so that the whole column is highlighted and selected. Right click the column and click ‘Copy’ then right click the column again and click ‘Paste Special’. A box will appear and you need to select ‘Values’ from the ‘Paste’ list, as shown here:

Click the OK button at the bottom when you have done this. When you now click on one of the cells in your merged data column (again, column C in this example) you should now see that the formula has been removed and you are left with the actual full name as the only data held by the cell:

NOW it is safe to delete the ‘firstname’ and ‘lastname’ columns, leaving you with a data file that just holds two columns, ready to upload with fullnames and email addresses.
Hope you found that useful. Just before I finish off, going back to the original data file, if you wanted to merge together three columns of title, firstname and lastname with the correct spaces inbetween then that is possible too….you would change the starting formula you use to =A1&” “&B1&” “&C1
Thank you for reading. If you need a hand with your newsletter campaigns then please read more about our email marketing services.